Your RV’s roof faces constant exposure to the sun’s harmful ultraviolet rays, making it one of the most vulnerable parts of your recreational vehicle. Over time, this UV exposure can cause significant damage, leading to costly repairs and potential interior damage from water infiltration.
Fortunately, taking the time to learn how to protect your RV roof with the right sealants can extend its lifespan and save you thousands of dollars in repairs. This guide covers the essential information every RV owner needs to know about UV protection and roof sealants. That way, you can protect your vehicle to the best of your ability.
Understanding UV Damage: How the Sun Affects Your RV Roof
UV radiation breaks down the molecular structure of roofing materials through a process called photodegradation. This occurs when high-energy UV photons penetrate the roof’s surface and disrupt the chemical bonds that hold the material together.
Common Signs of UV Damage
Although the damage occurs on a molecular level, RV roofs exhibit specific indicators when UV damage begins to happen. Rubber roofs typically develop a chalky white residue on the surface, while the material becomes brittle and prone to cracking. Fiberglass roofs may show fading, yellowing, or deterioration of the gel coat, resulting in a rough, porous surface.
Metal roofs can experience paint failure, rust formation, and thermal expansion issues that create gaps in seams. Lastly, TPO (Thermoplastic Polyolefin) roofs often develop stress cracks and lose their flexibility over time.
Long-term Consequences
Untreated UV damage progresses rapidly once it begins. Small cracks expand into larger fissures that allow water penetration. This moisture infiltration can damage interior walls, flooring, and electrical systems. The structural integrity of the roof decking may also be compromised, leading to costly repairs that far exceed the cost of preventive maintenance.

Types of Roof Sealants: Options for UV Protection
Luckily, whether your roof already has some minor damages or you’re simply being proactive, you can apply sealants to help ward off inevitable UV damage. Different sealant types offer varying levels of UV protection and durability, so it’s up to you to learn about each one. That way, you can select the most appropriate product for your specific roof type and environmental conditions.
Acrylic Sealants
Acrylic sealants provide excellent UV resistance and maintain flexibility across temperature ranges. These water-based products are easy to apply and clean up with soap and water. They form a protective barrier that reflects UV rays while allowing the roof material to expand and contract naturally.
Most acrylic sealants offer 5-10 years of protection before requiring reapplication. They work well on rubber, fiberglass, and metal roofs, though you should always verify their compatibility with the manufacturer’s specifications before purchasing.
Silicone Sealants
Silicone-based sealants offer superior longevity and UV resistance compared to acrylic options. These products maintain their flexibility even in extreme temperatures and provide excellent adhesion to most roofing materials.
The primary disadvantage of silicone sealants is that they’re not easy to paint over and can be difficult to remove if future repairs are needed. They also tend to attract dirt and debris more readily than other sealant types.
Polyurethane Sealants
If you need a sealant you can paint over, polyurethane sealants are an excellent choice that provide exceptional durability. These products are obviously well-known for offering good UV resistance, but they’re also recognized for maintaining strong adhesion in various weather conditions.
Their application requires more careful preparation since polyurethane sealants are more difficult to remove if mistakes occur. They also have a longer curing time compared to acrylic products.
Elastomeric Coatings
The final option is elastomeric coatings that create a thick, rubber-like membrane over the entire roof surface. These products provide comprehensive UV protection and can bridge small cracks and gaps in the existing roof material.
While more expensive than traditional sealants, elastomeric coatings offer 10-15 years of protection and can significantly extend the life of an RV roof. However, they’ll require thorough surface preparation and multiple coats for optimal performance.

Application Tips: How To Properly Apply Roof Sealant
Once you pick out the right RV sealant for your needs, you’ll need to make sure you apply it correctly. Proper application techniques ensure maximum effectiveness and longevity of your UV protection system. Following these guidelines is the final thing you’ll need to know about UV protection and roof sealants to ensure you achieve professional-level results.
Surface Preparation
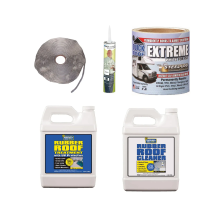
Clean the roof thoroughly with a mild detergent solution and allow it to dry completely. Remove any loose debris, old sealant, or chalky residue that could interfere with adhesion. For rubber roofs, use a rubber roof cleaner specifically designed for your roof type.
Inspect the entire surface for damage and make any necessary repairs before applying the sealant. You’ll need to fill small cracks with appropriate repair materials, while larger damage may require professional attention.
Weather Considerations
Apply sealants only when temperatures are between 50°F and 85°F and no precipitation is expected for at least 24 hours. Try to avoid applying during windy conditions as well, since that could affect coverage uniformity. Keep in mind that high humidity can extend curing times, while direct sunlight may cause the sealant to set too quickly, potentially affecting adhesion quality.
Application Technique
Use a high-quality brush or roller designed for roof applications. Apply sealant in thin, even coats rather than attempting to achieve full coverage in a single thick application. Work in manageable sections to maintain a wet edge and avoid lap marks.
Pay special attention to seams, vents, and penetrations where water infiltration is most likely to occur. Apply extra coats to these vulnerable areas as recommended by the manufacturer of your chosen sealant.
Curing and Maintenance
You’ll want to allow the sealant to cure completely before exposing it to foot traffic or severe weather. Most products require 24-48 hours for initial cure, with full cure occurring over several days.
Establish a regular inspection schedule during this time to monitor the sealant’s condition. Even after you’ve fully applied the sealant, annual inspections aren’t a bad idea, as they allow you to identify and address potential issues before they become major problems.
Safety Considerations
Remember to wear appropriate personal protective equipment during this process, including non-slip shoes, safety glasses, and gloves. Use proper ladder safety techniques as well, and consider using a spotter when working on your RV’s roof.
You’ll also want to ensure adequate ventilation when working with solvent-based products, and never work alone on roof projects. Keep a first aid kit accessible and inform others of your work schedule. By doing all of this, you’ll not only ensure your safety, but that of those around you as well.



Comments (0)
There are no comments for this article. Be the first one to leave a message!