
While many people recognize that maintenance is a critical part of owning an RV, some people don’t realize what it entails. Not only do you need to keep the interior looking presentable and wash the exterior on occasion, but you also have to take care of nitty-gritty tasks.
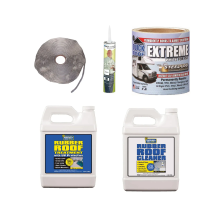
One of the more overlooked maintenance activities is protecting the RV’s roof. In particular, seal the roof with an RV roof sealant to ensure leaks don’t occur on rainy days.
But how do you get the most out of this product? That’s what we’re here to answer today in this list of practical tips to prolong the life of your RV roof sealant.
Start With a Quality Sealant
The foundation of a long-lasting RV roof starts with choosing the right sealant. Not all sealants are the same, and using an inferior product can lead to premature wear or failure. Investing in a high-quality sealant specifically designed for RVs will save you time, money, and frustrations in the long run.
Why Quality Matters
RVs endure harsh conditions such as rain, snow, fluctuating temperatures, and UV rays. An inferior sealant may crack, peel, or degrade under these conditions, leaving your roof vulnerable to leaks. Premium RV roof seam sealers, like silicone-based or UV-resistant products, can handle these challenges by providing a durable protective barrier.
Types of RV Roof Sealants
Of course, there are a wide variety of RV-specific sealants to choose from, so we’ll introduce you to the main types you’re likely to find on the market.
- Self-leveling sealants are excellent for horizontal surfaces and provide an even, professional finish. They work best on flat areas around vents, skylights, and air conditioners.
- Non-sag sealants, designed for vertical applications, work best for sealing sides or edges where self-leveling products aren’t as effective.
- A tape-based sealant, like butyl tape, is a quick and convenient option for addressing seams and cracks. While they’re simple to apply, they may not match the durability of liquid sealants for some applications.
Be sure to thoroughly look into each option to determine which type is best for your RV’s roof material, whether it’s TPO, EPDM, fiberglass, or aluminum. Always use sealants compatible with your roof type to avoid unnecessary damage.

Prepare the Roof Before Application
One of the most important things to know to help extend the life of your RV roof sealant is that applying it directly to a dirty or damaged roof can reduce its effectiveness. Proper preparation ensures the sealant adheres well and provides maximum protection.
Inspect for Damage
Before applying a new layer of sealant, thoroughly inspect the roof for any signs of damage, like cracks, punctures, or worn-out sections of the existing sealant. Take the time to address these issues by cleaning and patching up damage before proceeding with the application.
Clean the Surface
After your inspection, be sure to clean the RV roof to remove dirt, grease, and debris that may interfere with proper sealant adhesion. Use a mild detergent and a soft-bristle brush for general cleaning. Avoid harsh chemicals or abrasive scrubbers, as they can damage your roof’s membrane. Rinse thoroughly and allow the surface to dry completely before applying the new sealant.
You’ll want to remove any traces of oxidation or old caulk. For this task, use a plastic scraper or a dedicated sealant remover to avoid scratching the roof surface. Leaving even a small amount of residue could prevent the sealant from bonding correctly.
Choose the Right Tools for Application
You’ll also want to have the appropriate tools, including a caulk gun, an application nozzle, and cleaning rags. High-quality tools enable you to apply the sealant cleanly and evenly for better long-term results.
Clean and Maintain the Sealant Regularly
Even the best sealant requires regular care and maintenance to remain effective over time. Proper upkeep not only extends the lifespan of the sealant but also helps you catch potential issues before they become major problems.
Perform Routine Inspections
Get into the habit of inspecting the RV roof and sealant every three months or after extreme weather conditions. Look for cracks, peeling, or bubbles. Pay special attention to key areas like seams, vents, and skylights where damage often begins.
If you find small cracks or leaks, you can typically repair them quickly with a sealant touch-up. Ignoring minor damage can lead to larger, more expensive repairs down the road, so don’t delay necessary maintenance.
Clean the Roof Periodically
The more you use your RV, the more dirt and debris will accumulate on the roof. Periodic cleaning prevents buildup and ensures the sealant remains unharmed. Use a soft scrub brush and RV-safe cleaning solution to maintain your roof’s appearance and function.
Avoid power-washing, as it can dislodge the sealant or create new damage. Make cleaning the roof part of your regular RV maintenance routine, as this will help your sealant last longer, avoiding unpleasant surprises on the road.
Protect Against UV and Weather Damage
UV rays are among the greatest threats to RV roofs and sealants. Over time, sun exposure can cause the sealant to degrade or become brittle. Consider applying a UV-protective coating to shield the roof and sealant from direct sunlight. Additionally, actively parking your RV in a shaded area or under a protective cover when not in use adds another layer of defense.

Store Extra Sealant Properly
An overlooked aspect of RV sealant maintenance is storing any leftover product correctly. Since sealants are typically sold in larger quantities than you’ll use in one application, having extra on hand for touch-ups is a smart move.
Choose the Right Storage Conditions
Heat and humidity can cause the product to degrade, reducing its effectiveness the next time you use it. Store unused sealant in a cool, dry place away from direct sunlight and extreme temperature changes. Seal the container tightly to prevent air from getting in, as exposure can cause the product to harden prematurely.
Organize Your Sealant Supplies
Label the container with important details such as the type of sealant, date of purchase, and roof material compatibility. Keeping this information handy saves you time when it’s time for touch-ups or resealing jobs. When stored correctly, many sealants remain usable for two years or so, depending on the brand and formula.
Reexamine and Replace the Sealant, As Needed
Before reusing stored sealant, check its consistency, color, and application quality. If it appears clumpy, dried out, or has an unusual odor, replace it with a fresh product. Using compromised sealant could lead to ineffective repairs and additional problems in the future.


Comments (0)
There are no comments for this article. Be the first one to leave a message!