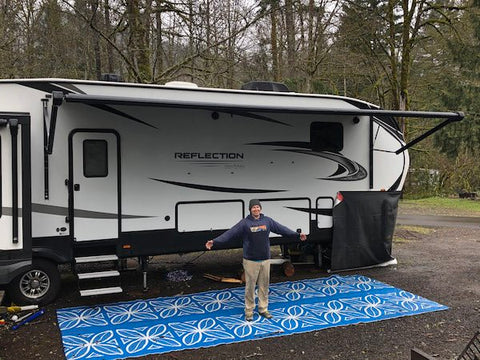
For many RV owners and camping enthusiasts, an RV is more than just a vehicle — it's a gateway to adventure, a home on wheels, and a haven in the great outdoors. Among the many features that make an RV feel like home, the RV awning stands out as both a practical necessity and a touch of luxury. It provides shade on sunny days, shelter from the rain, and expands the living space of your mobile abode. In this post, we'll guide you through every step of dealing with RV awnings, from recognizing when you need a new one, to choosing the right model, to installation, and finally, maintenance for longevity.
With a comprehensive understanding of RV awnings, you have the potential to enhance your RV experience significantly. So, let's dive in and explore how you can optimize your RV with the perfect awning.
When to Buy a New RV Awning
Before discussing the buying guide, it's essential to evaluate the state of your current awning. Over time, RV awnings can exhibit signs of wear and tear, including fading, sagging, tearing, or mechanical failure in retractable models. Routine inspections can reveal issues such as mildew, corrosion on metallic parts, or brittleness in the fabric — all indications that it might be time for an upgrade. When an awning becomes more of a hassle to deploy, maintain, or simply no longer provides adequate protection, it's time to consider a replacement.
Another sign that you might need a new awning is if your requirements have changed. Perhaps you need a larger shade area, or you want additional features such as LED lighting or integrated screens. Changing aesthetics or wanting an awning that is easier to operate can also be valid reasons to make a change.
Choosing the Right RV Awning
The market for RV awnings boasts a wide range of options, and selecting the most suitable one can feel overwhelming. Let's break down the key factors you should consider:
Material
RV awnings typically come in two types of material - fabric awnings made of vinyl or acrylic, and metal awnings typically made of aluminum. Vinyl awnings are waterproof and relatively easy to clean but can suffer damage more easily under harsh weather conditions. Acrylic, while not waterproof, allows more airflow and dries quickly, making it resistant to mildew and UV damage. Metal awnings, though less common, provide durability and longevity but come at a higher cost and lack the retractability of fabric awnings.
Size
The size of your awning should complement the dimensions of your RV. An awning that's too small won't provide adequate coverage, while one that's too large can look awkward and may be unstable. Measure the length of your RV where the awning will be installed and consider how much external space you want to be shaded.
Ease of Setup
Awnings range from manual setups, which require more physical work to extend and retract, to motorized awnings that roll out at the push of a button. While motorized awnings provide convenience, they tend to be costlier and more complex to install and repair.
Price
Budget can be a significant factor in your decision. Balancing quality with affordability is key. Cheaper awnings may save money initially but could lead to more expenses in repairs and replacements. Conversely, the most expensive options might offer features you don’t necessarily need. Aim for a quality product that fits within your budget and meets your requirements.
Installation Guide for RV Awnings
Installing an RV awning can be a DIY project, but it requires careful planning and precision. Below are step-by-step instructions to help you avoid common mistakes:
- Preparation: Gather all necessary tools and ensure you have enough people to assist you. Most installations will need at least two people. Read through the instruction manual thoroughly before beginning.
- Measure Twice: Confirm the mounting location and make sure you have adequate clearance for doors, windows, and other external features of your RV.
- Mounting The Brackets: Mark out where the brackets will go according to your measurements. Drill pilot holes to guide the mounting screws and secure the brackets to the RV's sidewall.
- Attaching The Awning: Carefully place the awning tube into the brackets with assistance. Make sure the awning is centered and secure it in place.
- Wiring (For Motorized Awnings): If you've chosen a motorized awning, you’ll now need to connect the wiring to your RV’s power supply, typically through a hole drilled in the RV wall. Ensure all electrical connections are safe and secure.
- Final Checks: Extend and retract the awning a few times to ensure smooth operation. Check all screws, bolts, and mechanical parts for proper fitment.
- Sealant: Apply a sealant around the brackets and any holes to prevent water from entering the RV.
Remember, the most common mistakes in installation are misalignment, improper securing of the brackets, or incorrect wiring. Always refer to the manufacturer's guidelines specific to your awning model.
Maintenance Tips to Extend the Life of Your RV Awning
Regular Cleaning
Prevent buildup of dirt, leaves, and debris by cleaning your awning regularly with mild soap and lukewarm water, especially after being in a harsh environment. Avoid using harsh cleaners as they can degrade the fabric's protective coatings.
Proper Storage
When retracting your awning, make sure it’s dry to prevent mildew and rot. If you have to store it while it's wet, set it back out to dry as soon as possible. For long-term storage, such as during winter months, thoroughly clean and dry your awning before storing it in a protective cover if available.
Inspect And Repair
Routinely check for rips, tears, or hardware malfunctions. Small issues can typically be repaired with a patch kit or replacement parts, but extensive damage will require professional attention or even replacement.
Retract in High Winds
Strong winds can cause severe damage to extended awnings. If you are aware of an impending storm or will be away from your RV, retract your awning to avoid any wind-related accidents.
By following these guidelines and maintaining a regular upkeep schedule, your RV awning can provide years of comfort and convenience.
Conclusion
An RV awning is more than just an accessory. It is an essential part of your RV that provides protection, convenience, and increases your living space. From assessing the need for a replacement, choosing the correct type, and installation, to maintaining your investment, this guide aims to empower you with the knowledge you need to get the most out of your RV awning. Remember that quality pays dividends in the long term, and proper care will keep your awning like new for years to come. So, go ahead, enhance your RV with an awning that suits your needs, and enjoy the great outdoors with a touch of comfort and style.


Comments (0)
There are no comments for this article. Be the first one to leave a message!