
The roof of your RV is one of its most critical components. It’s the barrier that shields you and your investment from rain, snow, heat, and other environmental factors. However, an often-overlooked aspect of RV maintenance is regularly inspecting the roof sealants that keep water and other elements from seeping into your vehicle.
This post highlights the importance of RV roof sealant inspections, including how to effectively maintain seals so your RV stays in top condition.
What Are RV Roof Sealants?
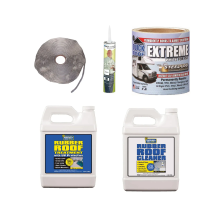
RV roof sealants are specifically designed substances that create a weatherproof barrier, sealing seams, joints, and other potential entry points on the roof. The sealants are formulated to withstand outdoor conditions, including UV rays, temperature extremes, and rain. Common types of RV roof sealants include the following:
Silicone-Based Sealants
Silicone sealants are highly flexible and durable, making them ideal for RV roofs. They resist UV rays and can last for several years without cracking. However, they may not adhere well to all materials.
Polyurethane Sealants
These sealants are extremely strong and offer exceptional adhesion to a wide range of surfaces. They’re leak-resistant, and you have the option to paint over them for better aesthetics.
Self-Leveling Sealants
Primarily used around flat or horizontal surfaces such as vents or air-conditioning units, self-leveling sealants spread evenly for a seamless finish. They’re typically easy to apply, making them popular among DIY enthusiasts.
Tape Sealants
Butyl tape or similar adhesive tape is often used in combination with other sealants to secure seams and overlaps. While practical, tape sealants may not offer the same durability as liquid options when used entirely on their own.

Why Inspect Sealants Regularly?
It’s time to delve deeper into the importance of regularly inspecting RV roof sealants. Failing to do so can lead to major issues that could compromise the safety and value of your vehicle. Here are some common risks associated with neglected seals.
Water Leaks
The most immediate consequence of deteriorated sealants is water leakage. Over time, even small leaks can cause widespread damage as water seeps into your RV’s interior.
Mold and Mildew Growth
If water gets into the roof or walls, it creates a damp environment perfect for mold and mildew growth. These fungi damage your RV’s interior and can pose health risks to occupants.
Structural Damage
Prolonged water penetration can weaken your vehicle’s structural components, such as wooden panels and insulation. This damage is costly to repair and compromises the overall safety of your motorhome.
Reduced RV Value
When it comes time to sell or trade in your RV, visible damage from leaks and compromised roof sealants can substantially lower its resale value. Even if you repair it beforehand, it’ll cost a lot more than it should to bring your vehicle up to standards if you let these problems occur.
How Often To Inspect RV Roof Sealants
While roof sealants are designed for durability, environmental factors and usage frequency can accelerate their wear. To avoid these problems, inspect roof sealants on a consistent schedule. The general recommendation is routine inspections every three to six months to identify early signs of wear.
Inspect your roof after severe weather events, including windstorms, hail, heavy rain, or snow. Also, if your RV has been in storage for a while, check the roof sealants for damage caused by time and general exposure before taking the vehicle back on the road. No matter how often you end up doing it, these regular checks will give you peace of mind and help you spot issues before they escalate.
Tools Needed for Sealant Inspection
Proper roof sealant inspections require the right tools. Here’s a list of some of the items you might need:
- A sturdy, adjustable ladder to safely access the RV roof if you don’t have one built in.
- A flashlight for better visibility in low-light areas or during cloudy conditions.
- An inspection mirror, which is ideal for viewing hard-to-reach areas without bending awkwardly.
- Cleaning materials like a soft cloth and RV-safe cleaner for wiping away dirt and debris and better assessing roof sealant conditions.
- A sealant applicator for immediate repairs like a caulking gun or self-leveling dispenser.

Step-by-Step Sealant Inspection Guide
Once you have everything you need, it’s time to start your inspection. We’ve put together a brief list of steps to follow when checking your RV roof sealants to help you get the job done correctly.
1. Prioritize Safety
Set up your ladder securely on flat, stable ground. Wear sturdy shoes to avoid slipping, and if possible, have a second person nearby for added safety while on the ladder.
2. Clean the Roof Surface
Remove dirt, leaves, and debris from your motorhome’s roof to get a clear view of the sealants. Use an RV-safe cleaning solution to avoid damaging the roof material.
3. Check for Cracks and Gaps
Carefully examine all sealants for visible signs of wear, such as cracks, peeling, gaps, or bubbling. Sealants in high-stress areas, such as edges or around vents, are especially prone to damage.
4. Inspect Seams and Joints
Pay close attention to seams, overlapping panels, and joints where water is most likely to penetrate. Use a flashlight or inspection mirror to look for hidden damage.
5. Test Around Attachments
Inspect areas surrounding vents, skylights, antennas, or other attachments. These are common weak points in RV roofs and may exhibit early deterioration.
6. Take Notes and Pictures
Document problem areas with photos and notes. This way, you can monitor changes over time or share details with a professional if damages are more extensive than cracked sealants.
Repairing or Replacing Sealants
After an inspection, you may discover areas where repair or replacement is necessary. Here’s what you should know to help you determine the appropriate action to take.
When To Repair Sealants
If the damage is minor, such as small cracks or peeling edges, you can apply a fresh layer of compatible sealant over the existing one. You’ll reinforce the barrier and seal vulnerabilities. Clean and dry the area before applying sealant to avoid having your new layer come back up immediately.
When To Replace Sealants
If the sealant is severely damaged, detached, or showing significant wear, it might be time for a replacement instead. Use a scraper to remove the old sealant carefully, clean the area thoroughly, and reapply a new layer following the sealant manufacturer’s instructions. For the best results, take your time while applying the sealant. The better you do now, the less likely you’ll be to need to replace it again in six months.


Comments (0)
There are no comments for this article. Be the first one to leave a message!