RVs offer the freedom to explore the open road and the great outdoors. However, like any other vehicle, they come with maintenance responsibilities. One essential task that more RV owners should be aware of is recoating their roofs. This process not only protects the roof from the elements but also extends its lifespan.
This guide will help you understand when and how often to recoat your RV roof. By the end, you’ll feel confident to tackle this maintenance task with ease.
Signs That Your RV Roof Needs Recoating

Keeping an eye on your RV roof is crucial for maintaining its integrity. Regular inspections can help you spot signs of wear and tear early, preventing more extensive and costly repairs down the line. Key indicators that your RV roof needs recoating include visible cracks or tears in the roofing material or seams. These can allow water to seep in, potentially causing damage to the interior.
Another sign is discoloration, which suggests UV damage and the breakdown of protective layers. If you notice that parts of your RV roof seem unusually soft or spongy when pressed, water may have already infiltrated beneath the surface. Finally, mold or mildew suggest prolonged water exposure, a clear sign that recoating is due.
Importance of Regular Inspections
Regular inspections are important in identifying issues before they escalate. It’s generally recommended to check your RV roof at least twice a year, ideally before and after your travel season. By doing so, you can catch early signs of degradation and determine a good time to recoat it before severe damage occurs. Remember that neglecting roof maintenance can lead to more significant structural damage, which will require far more expensive repairs than a routine recoating.
How Often To Recoat Your RV Roof
The frequency of recoating depends on several external factors, including how often you use your RV. Understanding these factors will help you determine the appropriate maintenance schedule.
Factors That Affect Recoating Frequency
Roof material is one of the primary factors in determining how often recoating is necessary. Materials have distinct properties, and each requires a unique maintenance schedule. Additionally, the climate plays a significant role. If you frequently travel in areas with harsh sun, heavy snowfall, or everyday rainfall, your roof will face more wear and tear, necessitating more frequent recoating.
Of course, an RV that sees heavy use will naturally require more maintenance. However, leaving your RV parked outside in the sun and rain will also necessitate more frequent recoating.
Recommended Timelines for Different Roof Materials
Typical RV roof materials include rubber (EPDM or TPO), fiberglass, and aluminum. Rubber roofs, common in many RVs, usually require recoating every three to five years. Fiberglass roofs are more durable, often requiring recoating every five to seven years. Aluminum roofs, though less common, are like fiberglass in terms of recoating needs but may need additional attention due to their susceptibility to rust if not properly maintained.
The Recoating Process
Once you’ve determined that it’s time to recoat your RV roof, you must understand the process to execute it correctly. This guide will provide a step-by-step approach to recoating your RV roof, ensuring optimal protection and longevity.
Gather the Necessary Tools and Materials
Gather the necessary tools and materials before starting. These typically include a hose, soft brush, primer (if needed), roof sealant for repairs, recoating product, and appropriate applicators like rollers or brushes. Each step requires specific tools, and having them on hand enables a smoother process.
Step-by-Step Guide to Recoating an RV Roof
The first step in recoating your RV roof is to thoroughly clean it. Remove any dirt, debris, and old sealant using a hose and a soft brush. Be careful not to damage the roof surface during this process. After cleaning, allow the roof to dry completely. Once it’s dry, inspect it for existing damage, such as cracks, tears, or soft spots. Repair any minor issues before proceeding with the recoating process to ensure that the coating adheres to the roof, creating an effective seal.
After repairs, it’s time to recoat your roof. Start by applying a primer if your recoating product requires one. Once the primer has dried, apply the roof coating with a roller or brush, working in sections to ensure even coverage. Allow the first coat to dry before applying additional coats as recommended by the manufacturer. This process may vary depending on the type of coating used, so always refer to the product instructions for best results.
Benefits of Regular Recoating
Regularly recoating your RV roof provides several benefits, chiefly extending the longevity of your roof and the RV itself. Coating the roof regularly protects it from sun, wind, rain, and snow, all of which can erode the material over time. With adequate recoating, problems like leaks and water damage become less frequent, making major repairs less likely and ultimately saving you money. Maintaining a regular recoating schedule is the best way to guarantee your RV continues to operate as intended.
Why You Should Recoat Your RV Roof Yourself

Although you could hire a professional to do this, now that you know when and how often to recoat your RV roof, doing it yourself can be rewarding and cost-effective. Taking on this task saves on labor costs since you only need to purchase the materials and tools. Plus, once you have all the stuff you need, future recoating is essentially free.
Doing it yourself allows you to work at your own pace and schedule and provides a sense of accomplishment. Even though it can be labor-intensive and time-consuming, the experience and satisfaction gained are invaluable. By recoating your RV roof yourself, you have complete control over the quality of the work and can ensure that it’s done to your standards.
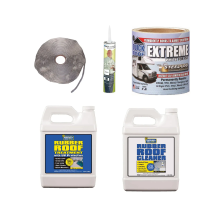
Of course, this all starts with having the right tools and materials, and United RV Center is here to help with that. We have all the roof coating supplies you need. From roof caulking for RVs to standard roof cleaners, you’ll be able to find it all right here on our website.






Comments (0)
There are no comments for this article. Be the first one to leave a message!