
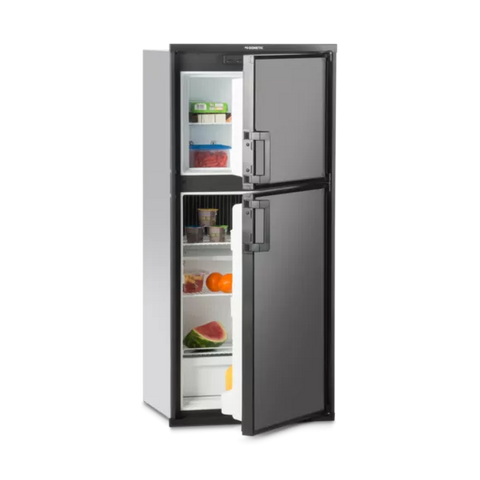
RV refrigerators operate differently from their household counterparts in some ways, but one aspect that makes them similar is the need for proper ventilation to function efficiently and safely. While this is much easier to achieve for most home refrigerators, the lack of extra space in an RV can make getting proper ventilation significantly more challenging. Fortunately, this guide is here to provide essential steps and maintenance tips you’ll need to ensure your RV refrigerator ventilation system operates at peak performance.
Why Is RV Fridge Ventilation So Important?
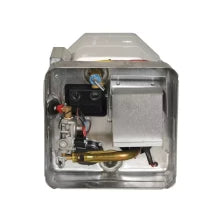
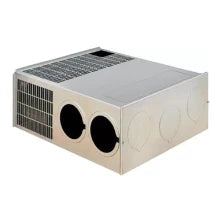
RV refrigerators rely on absorption cooling technology, which generates significant heat during operation. Unlike residential refrigerators that use compressors and release heat through coils on the back or bottom, RV fridges must dissipate heat through external vents to maintain proper cooling temperatures.
Poor ventilation creates multiple problems. Heat buildup forces the refrigerator to work harder, dramatically increasing propane consumption and draining your battery faster when running on 12V power. On top of that, the cooling unit becomes less efficient, leading to inconsistent temperatures and potential food spoilage. More seriously, though, inadequate ventilation can cause the cooling unit to overheat and fail permanently, resulting in costly repairs or a complete replacement.
Proper ventilation of your RV refrigerator can also prevent dangerous situations. Blocked vents can lead to overheating, which may damage surrounding cabinetry or create fire hazards. Additionally, proper airflow helps prevent moisture buildup behind the refrigerator, reducing the risk of mold and structural damage to your RV.

Steps To Improving RV Refrigerator Ventilation
To avoid these issues and maximize the benefits of your RV fridge, it’s essential to know how to ventilate it properly. These detailed steps that we’ve put together will help you optimize your refrigerator’s performance.
Inspect and Clean Exterior Vents
Start by examining the exterior vents on your RV. Most RV refrigerators have both upper and lower vents on the outside wall. The lower vent allows cool air to enter, while the upper vent releases hot air. Remove any debris, leaves, and spider webs blocking these openings.
Clean these covers thoroughly using warm, soapy water and a soft brush. Pay attention to the vent slats and ensure they move freely if they’re adjustable. Check for damage, such as cracked or bent fins, that could restrict airflow. Replace damaged vent covers immediately to maintain proper ventilation.
Check Interior Ventilation Panels
Open your RV refrigerator and locate the interior ventilation panel, typically found at the lower section of the back of the unit. Remove this panel carefully and inspect the area behind it. This space should be clear of stored items, dust, and debris.
Clean any accumulated dirt or dust using a vacuum cleaner with a brush attachment. Ensure the refrigerator coils and cooling unit components are visible and unobstructed. Never store items in this ventilation space, as they will block critical airflow paths.
Verify Proper Vent Sizing
Measure your exterior vents to confirm they meet manufacturer specifications. Standard RV refrigerator vents should provide approximately 20 square inches of opening area for the lower vent and 24 square inches for the upper vent. Undersized vents significantly reduce cooling efficiency and may void your warranty.
If your vents are too small, upgrade to larger units that meet proper specifications. This modification may require enlarging the exterior openings, which should be done carefully to maintain the RV’s structural integrity and weather sealing.
Install Ventilation Fans
Consider adding ventilation fans to improve airflow, especially if you frequently camp in hot climates. It’s typically ideal to put an exhaust fan in the upper vent to pull hot air out more efficiently, but some RV owners install intake fans in the lower vent as well for additional assistance.
Choose fans specifically designed for RV refrigerator ventilation. These fans are typically 12V units that you can wire directly to your fridge. That way, they’ll operate automatically when the refrigerator runs. Just be sure to follow the manufacturer’s instructions for proper installation and wiring.
Seal Air Leaks
Inspect the area around your refrigerator for air leaks that could disrupt proper ventilation flow. Check the seals around the exterior vents and repair any gaps with appropriate RV sealant. Examine the interior ventilation compartment for leaks that might allow conditioned air from inside the RV to interfere with the cooling process.
Use expanding foam or other appropriate materials to seal gaps around the refrigerator unit itself, ensuring that air flows through the designated ventilation path rather than escaping through unintended openings.
Tips for Maintaining Optimal Ventilation
Regular maintenance ensures that your RV refrigerator’s ventilation system continues to operate effectively. This starts with regular monitoring of its performance. If you notice the unit taking longer to cool, running more frequently, or consuming more energy than usual, ventilation problems may be the cause. Be sure to use this time to check temperatures with a reliable thermometer. Your refrigerator should maintain temperatures between 35°F and 38°F, while the freezer should stay between 0°F and 5°F.
During extremely hot weather, take additional precautions to maintain proper ventilation. Park with the refrigerator side of your RV facing away from direct sunlight when possible. Use awnings or other shade structures to reduce heat load on the vents, and consider running ventilation fans continuously during peak heat hours.
You’ll also want to inspect and clean the refrigerator’s internal components annually. Remove the lower access panel and carefully clean the burner assembly, flue, and cooling unit coils. You should have someone familiar with RV refrigerator systems or a qualified technician perform this maintenance if at all possible.

Troubleshooting Ventilation Problems
When ventilation issues arise, systematic troubleshooting helps identify the root cause. If your refrigerator isn’t cooling properly, first check that both exterior vents are completely unobstructed. Even partial blockages can significantly impact performance.
Test airflow by holding a tissue or light fabric near the vents while the refrigerator operates. You should feel air movement at both the upper and lower vents. Lack of airflow indicates blockages or damaged components that require immediate attention.
Unusual noises from the refrigerator area may also indicate ventilation problems. Overheated cooling units often make gurgling, popping, or hissing sounds. If you hear these noises, turn off the refrigerator immediately and inspect the ventilation system thoroughly.
Check for hot spots on the exterior of your RV near the refrigerator vents. Excessive heat indicates poor ventilation and potential damage to the cooling unit. Be sure to address these ventilation problems immediately to prevent permanent damage to your refrigerator system.
Temperature fluctuations inside the refrigerator can point to ventilation issues as well. If temperatures vary significantly throughout the day or the unit cycles on and off frequently, improved ventilation may resolve these problems.
If any of these problems become too big to fix, an RV refrigerator replacement from United RV Center may be your best course of action. This will instantly remedy your problems and start you off on the right foot with a more modern ventilation system, which should keep things running smoothly for many years to come.


Comments (0)
There are no comments for this article. Be the first one to leave a message!