
Your RV’s freshwater system is crucial for a comfortable and enjoyable travel experience. To get the most out of your system, proper maintenance is essential, as it keeps your water safe for use and extends the system’s lifespan, preventing damage and costly repairs. This guide explains the components of the freshwater system in detail and goes over the key maintenance tasks you’ll want to employ to help you care for your RV effectively.
Understanding Your RV Freshwater System
The goal of your RV’s freshwater system is to deliver clean, potable water for drinking, cooking, bathing, and cleaning. To do that effectively, it uses several interrelated components, each with a specific function in ensuring water is safely stored and distributed.
Freshwater Tank
The freshwater tank is the heart of your RV’s clean water system. This large container stores the clean water that you use throughout your trip. Located beneath the RV, it’s filled manually or via an external water source. Regular cleaning of this tank is vital to prevent bacteria buildup over time.
Water Pump
The water pump creates the pressure required to push water through your RV’s pipes and out of your faucets. The pump activates automatically when you open a faucet or turn on a shower, so it needs constant access to power. A malfunctioning pump will disrupt the entire water system.
Pipes and Fittings
A network of pipes and fittings delivers water from the tank to various parts of your RV, such as the kitchen and bathroom. These pipes, often constructed from PEX (cross-linked polyethylene) or flexible tubing, are designed to withstand vibrations and temperature changes, but periodic checks for damage or leaks are still highly recommended.
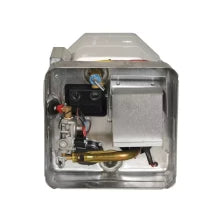
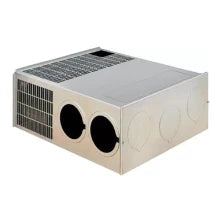
Water Heater
Although optional in some RV models, a water heater is a must-have feature for most travelers. It provides hot water for showers, dishwashing, and other tasks. This device requires periodic draining and descaling to operate efficiently, so make sure you have a quality camper water heater that’s up to the task.
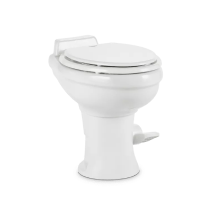
Devices and Fixtures
Faucets, showers, toilets, and other fixtures connected to your system also play a role in delivering water efficiently. If you don’t take care of them, using water in your RV will become much more difficult.

Essential Maintenance Tasks
As with most things, regular maintenance will be essential to ensuring that your freshwater system doesn’t have any contamination, leaks, or damage caused by wear and tear or extreme weather conditions. Here are the most important maintenance tasks you should focus on for your RV freshwater system to keep it fully operational.
Sanitizing the Freshwater System
Sanitizing is easily the most important maintenance task for your freshwater system. Over time, microbes and bacteria can accumulate in the tank, pipes, and fixtures, leading to unpleasant tastes or even potential health risks. These are the best steps for sanitizing your system.
Drain the Tank
Start by emptying your freshwater tank completely. Make sure the gray and black tanks are also empty if they share drainage lines with the freshwater system.
Prepare a Sanitizing Solution
Combine a 1/4-cup of household bleach for every 15 gallons of tank capacity. Dilute the bleach in a gallon of water before adding it to the tank.
Fill and Flush the System
After adding the bleach solution, fill the rest of the tank with clean water. Turn on each faucet one by one until the bleach solution starts flowing through the system, and let them run a minute before turning them off. Allow the solution to sit in the system for at least 12 hours to ensure maximum sanitation.
Rinse Thoroughly
Once done, you’ll need to drain the tank again and flush it multiple times with clean water to ensure all traces of bleach are completely gone. Test the water’s smell and taste before use. Do this about twice a year for the best results.
Checking for Leaks
Leaks can be a common issue in RV freshwater systems, especially older ones. It’s important to take care of them as soon as possible since they can lead to water loss, reduced pressure, or expensive repairs if left untreated. Here are some steps to follow for inspecting for leaks.
Visual Inspection
Examine all visible pipes, fittings, and fixtures for any signs of water pooling, dampness, or corrosion. Pay close attention to joints and connections, but be sure to still check the length of the pipes for cracks.
Pressure Testing the System
Using a pressure gauge, you can test the system to determine if there is a loss of pressure, which may indicate a hidden leak. Turn off all faucets and appliances, then monitor pressure levels. Dropping pressure suggests that water is escaping somewhere.
Seal Repairs
If you find any leaks, repair them promptly. Replace damaged seals or fittings, and use pipe sealant tape for minor issues. Larger problems may require professional assistance, so don’t hesitate to make calls when needed.
Winterizing Your Freshwater System
If you plan to store your RV in a place that’s not climate-controlled during colder months, winterizing the freshwater system will be a necessity. This will help prevent water from freezing and damaging the pipes or tank. The following guidelines explain how to go about proper winterization.
Drain the System
Empty the freshwater tank, water heater, and all pipes completely. Open all faucets to ensure water is released.
Bypass the Water Heater
Many RVs have bypass valves for the water heater. Activating these valves prevents antifreeze from entering the water heater during the process, which can damage it if not fully drained afterward.
Add RV-Safe Antifreeze
Use a hand pump or the RV’s water pump to circulate RV-safe antifreeze through the system. Open faucets one by one until antifreeze flows out, ensuring all pipes are protected. Antifreeze helps safeguard against cracks caused by frozen water.
Inspect Before Use
When spring comes, flush the system thoroughly to remove all traces of antifreeze. Refill with clean water and test the system for any lingering issues.

Routine Cleaning of Fixtures
Over time, faucets, showerheads, and other fixtures can develop sediment buildup or experience reduced flow. Unscrew faucet aerators and clean them, removing any deposits. To make things easy, you can soak showerheads in vinegar to dissolve hard water residue.
Regularly Replace Filters
If your freshwater system includes a filtration system, schedule regular filter replacements to maintain efficiency. Over time, dirty filters reduce water flow and allow contaminants to pass through. Refer to the manufacturer’s recommendations for replacement intervals, typically every three to six months, depending on usage.
Monitor Water Quality
Whenever you refill your freshwater tank, be sure to only use clean and safe water sources. To double-check this, consider using an in-line water filter at external fill connections to remove sediments and impurities before they enter your system, and monitor the quality afterward to ensure everything is safe to use.


Comments (0)
There are no comments for this article. Be the first one to leave a message!