

You pull into your site after a long drive, step inside, and something feels off. A can rolls across the counter. The shower door swings shut on its own. Your fridge is running, but it never quite gets cold.
Most of the time, the cause is simple. Your RV is not level.
Leveling an RV is one of the first skills every owner picks up, and it takes about ten minutes once you know the sequence. This guide walks you through the order of operations, the tools, and the small details that keep you from doing the job twice.
Quick RV Leveling Checklist
Save this one for the campsite:
- Walk the site and pick the flattest spot
- Check side-to-side level while still hitched
- Stack blocks on the low side, with a ramp
- Drive on slowly and recheck
- Chock the wheels
- Unhitch
- Level front to back with the tongue jack or landing gear
- Deploy stabilizer jacks onto pads, firm contact only
- Recheck level, including at the fridge
- Run slides out and confirm one last time
How to Level an RV: Step by Step

Here is the full process from pulling into the site to settling in. It moves in a specific order for a reason, since each step depends on the one before it. Work through it top to bottom and you should only have to do each part once.
Step 1: Choose the Flattest Spot You Can
Before you commit to a parking position, walk the site. A minute of looking saves five minutes of blocks. Look for the flattest stretch and note which way the ground falls.
Also check that your slides have clearance, your power pedestal and sewer connection are within reach, and your door side is on ground you actually want to step out onto.
Step 2: Check Your Starting Point
Pull into the site in roughly the position you want and check your level side to side. Note which side is low and by how much. If you are using an app, it will usually tell you the lift needed in inches.
If you are working from a bubble level, a rough field method works fine: a bubble sitting about one bubble-width off center is generally a small correction, in the ballpark of an inch. You will get a feel for your own rig quickly.
Step 3: Level Side to Side With Blocks
This is where most of the work happens.
How to Level an RV With Blocks
- Note the low side and the lift you need. One inch, two inches, three inches. This determines how many blocks you stack.
- Pull forward or back to clear the spot. You need room to set the blocks where the tires will sit.
- Stack your blocks to the height you need, and build a ramp on the approach side. Most interlocking blocks are designed so the stack steps down toward the direction you drive in from. Without a ramp, you are asking the tires to climb a wall.
- Place blocks under every tire on the low side. On a tandem axle trailer, that means both tires on that side get a stack of the same height.
- Drive on slowly with a spotter if you have one. Stop when the tires are centered on the top block, not hanging over the edge.
- Recheck your level. Adjust by adding or removing a block if you overshot or came up short.
A few things worth getting right:
- Each tire should sit fully on its block with the whole tread supported. A tire hanging over an edge puts an uneven load on the sidewall.
- Do not stack blocks higher than the block manufacturer recommends. If a site needs more than three or four inches of lift on one side, look for a better spot.
- On soft ground, put a wider base under your stack so it does not sink or tip.
- Stacks under tandem axles should be the same height, or you shift weight onto a single axle.
Step 4: Chock the Wheels

Once you are level side to side and parked where you want to stay, chock the wheels before you touch the hitch. Put chocks snug against the tires on both sides of the rig.
If you are parked on any grade at all, chock the downhill side first. This is the point in the process where a rig can roll, so do not skip it or leave it for later.
Step 5: Unhitch and Level Front to Back
Now you can disconnect.
For a travel trailer: raise or lower the tongue jack until your front-to-back bubble reads level. Put a jack pad under the jack foot before you take weight on it.
For a fifth wheel: use the landing gear the same way, with pads under both feet.
For a motorhome without automatic leveling: front-to-back correction comes from blocks under the front or rear wheels, following the same process as Step 3.
Give the jack time and listen to it. If the motor sounds strained or the frame is groaning, stop and reassess rather than pushing through it.
Step 6: Deploy Stabilizer Jacks
Once the rig is level on both axes, put down your stabilizer jacks.
Stabilizer jacks are not leveling jacks. They are designed to stop the rig from rocking, not to lift it. Using scissor jacks or corner stabilizers to raise a corner can flex or damage the frame. Extend them until they make firm contact with the ground, take up a little weight, and stop there.
Use jack pads under each one, especially on gravel, dirt, or asphalt in Texas summer heat.
Step 7: Recheck Before You Settle In
Check your level one more time after everything is down. Deploying jacks and stabilizers can shift things slightly, and the rig will settle a little once you and your gear are inside.
Pay attention to the fridge here. Set a small level inside the freezer compartment or on a shelf if you want to confirm the appliance itself is sitting true. Then run your slides out and check once more.
Tools You Need to Level an RV
You do not need much, and none of it is expensive. Here is the short list.
Leveling Blocks
Leveling blocks are the workhorse of the job. Most are interlocking plastic that stack like building blocks, so you can build a ramp and a platform to the height you need. Some RVers use solid wood blocks or cut lumber instead, which works fine as long as the wood is sound and wide enough to support the full tire footprint.
You can also use curved or wedge-style levelers, which you drive up onto and stop at the height you want. Andersen leveling blocks include a camper leveler that pairs a curved ramp with a chock to lock the tire in place, so you can land on an exact height rather than working in fixed block increments. They are quick for everyday corrections, though a curved leveler covers a smaller lift range than a tall stack of blocks. Check your tire size before ordering.
A Bubble Level

A simple stick-on bubble level mounted on your RV, or a carpenter's level you carry in a bay, gives you a direct reading you can trust. Many owners mount one crosswise on the tongue or A-frame and one lengthwise on the frame rail.
If you are checking with a handheld level, the countertop is not always the most reliable reference surface, since counters are not always installed perfectly true. The floor near the center of the rig or the frame itself is a better reference.
An RV Leveling App
A dedicated RV level app on your phone turns the phone's built-in sensors into a digital level, and most will show you exactly how many inches of lift you need under a given tire. Calibrate the app once while the rig is known to be level, and keep the phone in the same spot each time you use it.
Wheel Chocks
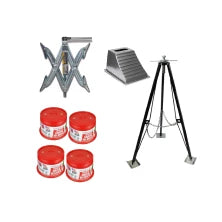
Wheel chocks keep the rig from rolling once the tow vehicle is disconnected, and they are not optional. Standard chocks go in front of and behind a tire. X-style chocks wedge between tandem axle tires to reduce side-to-side rocking and are a useful add-on, but they are not a substitute for real chocks. Keep a set of RV wheel chocks in an outside bay so they are always the first thing you reach for.
Jack Pads & Base Plates
Jack pads spread the load from your stabilizer or leveling jacks across a wider footprint so the jack foot does not sink into soft ground, gravel, or hot asphalt. If you camp anywhere other than concrete, you will want these.
Shop RV stabilizers, jacks, and wheel chocks at United RV Parts.
Why Leveling Your RV Matters
Leveling is not just about comfort. Several systems in your RV depend on gravity to work the way they were designed to work.
Refrigerator Performance
This is the big one. Most RV refrigerators are absorption fridges, which means they use gravity to circulate refrigerant through a closed loop of tubing instead of a compressor. Park at an angle and that circulation slows down or stops, so the fridge cools poorly or not at all.
Run an absorption fridge out of level long enough and refrigerant can pool where it should not, which can lead to blockages and expensive cooling unit damage. Many newer models tolerate a few degrees of tilt, but tolerance is not the same as a recommendation. If you want the full picture on this, we covered it in detail in What Does RV Leveling Have To Do With Fridge Function?
Check your refrigerator's manual for the tilt tolerance listed by your manufacturer.
Slide-Out Operation

Slide-outs are heavy, and they ride on rails, gears, or hydraulic rams that are built to move along a level plane. When the frame is twisted or tilted, those mechanisms bind.
You may notice the slide moving slower than usual, stalling partway, or making a grinding sound. Over time, running slides out of level puts extra load on the motor and can wear the seals unevenly, which leads to water intrusion down the road. Level first, then run your slides.
Doors, Drawers & Daily Living
A rig that sits low on one side turns every cabinet door into a swinging hazard. Drawers slide open on their own. Chairs drift. None of it is dangerous, but it wears on you over a weekend.
Sleep Comfort
Front-to-back tilt is the one you feel at night. Sleeping with your head lower than your feet is uncomfortable for most people, and if your rig has a noticeable nose-down angle, you will feel it in the mattress before you feel it anywhere else.
Plumbing & Drainage
Your RV's gray and black tanks drain by gravity, and so do your shower pan and sinks. When the rig tilts away from the drain outlets:
- Water pools in the shower pan instead of draining
- Tank level sensors read inaccurately
- Waste solids settle unevenly in the black tank, which makes dumping less effective
- Sinks drain slowly
Getting the rig level, or very slightly nose-high if your outlets are toward the rear, helps everything drain the way it was designed to.
Common RV Leveling Mistakes
If something is not going right, it is usually one of these.
- Leveling front to back before side to side. You will end up doing both twice.
- Unhitching too early. Once you are disconnected, getting back onto blocks is much harder.
- Using stabilizer jacks to lift. They stabilize. They do not level.
- Blocks under only one tire of a tandem axle. This shifts weight and can stress the suspension.
- Skipping the chocks. Nothing else on this list is a safety issue. This one is.
- Trusting the countertop. Counters are not always installed dead level. Reference the floor or frame.
- Forgetting to recheck after the slides come out. Slide weight moves the balance point.
- Crawling under the rig while it sits on blocks or jacks. Blocks and stabilizers are not designed to hold a rig up for work underneath it. Use proper jack stands if you need to get under there.
Level Once, Get On With Your Trip
Leveling looks fussy the first few times and then becomes a ten-minute habit you barely think about. Side to side first, chock, then front to back, then check it one more time. Get that sequence right and your fridge, slides, and plumbing all work the way they were built to.




Comments (0)
There are no comments for this article. Be the first one to leave a message!