Adding an external fuel tank to your RV generator is a great way to noticeably extend runtime and reduce the frequency of refueling stops during long trips. That’s because this setup allows you to carry additional fuel capacity, making extended boondocking or off-grid adventures much more convenient.
To take full advantage of this, proper installation will be required to ensure the safety and longevity of your generator. This step-by-step guide covers everything from selecting the right materials to testing your completed connection, ensuring you’re able to connect your external fuel tank to your RV’s generator with no issue.
Tools and Materials Needed
Before getting started, you’ll need to gather your tools. For this project, you’ll definitely need an adjustable wrench, a screwdriver set, a utility knife for cutting fuel lines, and fuel line clamps or a crimping tool, depending on your connection method. You’ll also need a measuring tape to determine proper fuel line length and a funnel for safe fuel handling.
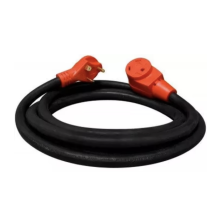
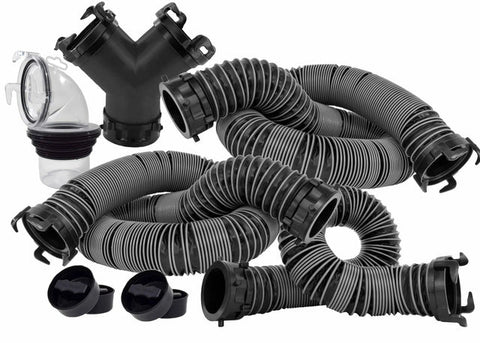
Other required materials include a compatible external fuel tank, appropriate fuel line (typically 1/4-inch or 3/8-inch diameter), quick-connect fittings or barbed fittings with clamps, and a fuel stabilizer if you plan to store fuel for extended periods. Consider purchasing extra clamps and a small length of spare fuel line for future maintenance.
Don’t forget your safety equipment, either. This should include nitrile gloves to protect your hands from fuel, safety goggles, and ensure you have a fire extinguisher rated for flammable liquids nearby during the installation process.
Safety Precautions
Speaking of safety, there are some other things you’ll want to keep in mind. First of all, be sure to work in a well-ventilated outdoor area away from any ignition sources, including pilot lights, electrical equipment, or smoking materials. Fuel vapors can accumulate quickly in enclosed spaces and create dangerous conditions even with small amounts of fuel present.
When it comes to fire extinguishers, you’ll want to keep a Class B one within easy reach throughout the installation process. Remove all flammable materials from your work area, and avoid wearing synthetic clothing that can generate static electricity. Ground yourself by touching a metal surface before handling fuel components.
When handling fuel, exercise caution to prevent spills and skin contact. Clean up any spilled fuel immediately with absorbent materials, and dispose of contaminated materials according to local regulations. Never work on fuel systems while the generator is running or still hot from recent operation.

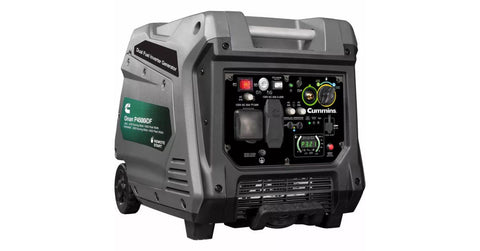
Understanding Your RV Generator
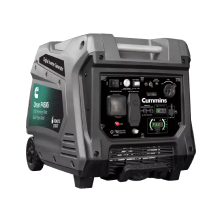
RV generators typically operate on gasoline, diesel, or propane, with each fuel type requiring specific connection methods and components. Most portable RV generators have a gravity-feed fuel system that can easily accommodate external tank connections, while some larger units may have fuel pumps that require different setup procedures.
External fuel tanks work with most generator models, but compatibility depends on the fuel type, connection port size, and flow requirements. Refer to your generator’s owner manual to determine the fuel intake location and any manufacturer-specific connection requirements or restrictions.
Some generators include a secondary fuel port specifically designed for external tank connections, while others require connecting to the existing fuel line. Understanding your generator’s fuel system design helps determine the best connection method and required components.
Preparing the External Fuel Tank
Once you have your external fuel tank, inspect it thoroughly before use, checking for cracks, dents, or corrosion that could lead to leaks. Examine all fittings, valves, and mounting hardware to ensure they’re secure and in good condition.
Be sure to clean the tank interior if you’ve used it previously or stored it for extended periods. Remove any debris, old fuel residue, or contaminants that could clog your fuel system. For new tanks, check for manufacturing debris or protective coatings and remove them from internal surfaces.
Verify that your fuel tank is designed for your generator’s fuel type, as gasoline and diesel require different tank materials and sealing compounds. Fill the tank with fresh, appropriate fuel, and add fuel stabilizer if recommended by the manufacturer to prevent fuel degradation during storage.
Setting Up the Fuel Line
Measure the distance from your external fuel tank’s outlet to your generator’s fuel intake, adding 12-18 inches for routing flexibility and connection adjustments. Make sure you get a fuel-rated hose specifically designed for your fuel type, as standard rubber hoses can deteriorate when exposed to gasoline or diesel.
Cut the fuel line cleanly with a sharp utility knife to prevent frayed edges that could interfere with connections. Inspect the cut ends to ensure they’re smooth and round, as irregular cuts can cause leaks or poor-fitting connections.
Install appropriate fittings on both ends of the fuel line using either quick-connect fittings for easy connection and disconnection, or barbed fittings secured with clamps for permanent installations. Apply fittings according to manufacturer instructions, ensuring proper orientation and tightness specifications.

Connecting the Fuel Line to the Generator
Locate your generator’s fuel intake port, typically found near the fuel tank or carburetor assembly. Some generators have a dedicated auxiliary fuel port, while others require connection to the existing fuel line between the tank and carburetor.
Attach the fuel line to the generator’s intake port using the appropriate connection method for your setup. For quick-connect systems, align the connectors and push firmly until you hear or feel them click into place. For clamp connections, slide the fuel line over the barbed fitting and secure it with clamps positioned approximately 1/4 inch from the line end.
Avoid common installation mistakes such as over-tightening clamps, which can damage the fuel line, or under-tightening, which allows leaks. Ensure proper alignment between connections to prevent stress on fittings that could cause future leaks or component failure.
Testing the Connection
Once you’ve connected the external fuel tank to your RV generator, you’ll need to test it to make sure it works. Start by priming the fuel system by opening the external tank valve and allowing fuel to flow through the line until it reaches the generator. Some setups may require manually operating a primer bulb or briefly cranking the generator to pull fuel through the system.
Check all connections for leaks by visually inspecting fittings and wiping connection points with a clean cloth to detect any fuel seepage. Pay particular attention to clamp areas and threaded fittings where leaks commonly occur.
Then, start your generator according to standard procedures and monitor fuel flow from the external tank. The generator should run smoothly without surging or fuel starvation symptoms. If you notice air bubbles in clear fuel lines, check for loose connections or improper priming. Weak fuel flow may indicate a clogged filter, kinked line, or inadequate tank positioning relative to the generator.


Comments (0)
There are no comments for this article. Be the first one to leave a message!