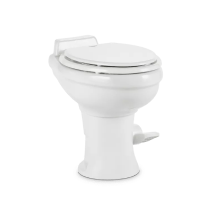
Whether you're cruising down the coastal highways or nestled in a cozy campground, your RV’s comfort and cleanliness are pivotal to your travel experience. Surprisingly, one of the most integral components of your RV's functionality can often be underappreciated – the humble RV toilet system. RVer or soon-to-be-road-warrior, understanding the intricacies of maintaining your RV's toilet can significantly enhance the enjoyment and longevity of your mobile home. Here's a comprehensive guide to keeping your RV toilet in top-notch condition.
Regular RV Toilet Cleaning Procedures
Your RV toilet, unlike your regular porcelain throne at home, operates in a confined space where preventing odors and mess is crucial. Regular cleaning isn't just about appearance; it's about hygiene and ensuring your onboard septic system remains operational without issues.
Step-by-Step Cleaning Routine
Start with a basic cleaning routine:
- Use an RV-safe toilet bowl cleaner to scrub the bowl’s interior. This cleaner is designed not to damage the seals and components of your toilet.
- Wipe down the toilet exteriors with a mild detergent, avoiding abrasive cleaners that could harm the seals.
- For a deep clean, consider removing the toilet and checking the area around the flange for any buildup or leaks. Consult your RV’s manual for specific instructions related to your make and model.
Tools and Products for the Task
The right tools and products can make this task much simpler:
- A non-scratch scrub brush and sponge.
- RV-specific toilet cleaner, which is often eco-friendly and won’t damage the septic system.
Unpleasant odors are often the result of inadequate cleaning. A weekly cleaning schedule is a great way to keep things fresh without a buildup of bacteria.
Sanitation and Odor Control
No RV road trip is enjoyable with an unwelcome stench wafting from the bathroom. Ensuring proper sanitation and odor control is about more than the product you choose; it’s also about proper usage and application.
Choosing the Right Treatment
There are various types of treatments to choose from:
- Chemical treatments are the most common, breaking down waste and keeping odors at bay.
- Organic treatments provide a more environmentally friendly solution, often using enzymes and bacteria to break down waste.
- Mechanical treatments, like ventilation fans, can help disperse odors.
Dealing with Persistent Odors
If odors persist, it’s time to troubleshoot:
- Check the vent pipe for obstructions that could be blocking the airflow.
- Ensure the toilet’s seals are in good condition and aren’t allowing gases to escape.
- Sometimes, it’s as simple as cleaning the tank more frequently if you defecate and eat a diet with higher sulfur content.
Preventative Maintenance Practices
An ounce of prevention is worth a pound of cure. This adage couldn't be truer when it comes to your RV toilet. Implementing a few preventative maintenance practices can save you from dealing with a crux on your next adventure.
Regular Inspections
Set a schedule for regular inspections:
- Check the flush valve and blade to make sure they're moving freely and don't show signs of damage.
- Inspect the seals, especially when it's time to replace the wax ring.
- Routinely check the connections, water lines, and hoses for any leaks.
Sealing and Lubricating
Maintain the smooth operation of components:
- Periodically lubricate moving parts with a silicone-based lubricant.
- Keep seals supple by applying a seal conditioner regularly.
- Don't forget the valve blade – keep it free of mineral deposits and lubricated to prevent sticking.
RV Winterization and Off-Season Care
Storing your RV for the winter or an extended period requires particular care for the toilet system. Frozen pipes or damage from disuse can be costly to repair come springtime.
Properly Winterizing Your System
Winterization steps include:
- Completely drain and flush the black and gray water tanks. Use a tank-rinse wand for the best results.
- Add RV antifreeze to the black water tank to protect the valves and seals.
- Consider removing excess moisture in the tank with a desiccant system designed for RVs.
Regularly Checking During Inactivity
Even if it's not winter, checking your RV, including the toilet, during periods of inactivity is crucial:
- Check for any damaged parts before storing your RV.
- Apply an odor treatment to prevent stale odors from developing.
- Consider covering your RV to prevent dust and debris from entering the toilet system.
Emergency Preparedness and Repairs
Despite the best maintenance efforts, emergencies can still arise on the road. Having the right tools and knowledge for simple repairs is invaluable.
Basic Repair Kit
Your basic RV toilet repair kit should include:
- A toolset with adjustable wrenches and screwdrivers.
- Spare parts like valve seals, flappers, or blade assemblies.
- Leak-detector paper to identify the source of a leak.
Quick Fixes for Common Issues
Here are some common toilet issues and simple fixes:
- If the toilet doesn't hold water, the problem is likely the gate valve. Replace the gate valve to fix the issue.
- Seal leaks can also lead to a toilet not holding water. Apply the leak-detector paper to identify the source and replace the necessary seals.
- For an unpleasant smell or slow flush, a thorough cleaning and potentially a valve or blade lubrication may be necessary.
By following these essential maintenance tips for your RV toilet system, you'll not only avoid the frustration of on-road issues but also ensure that your home-away-from-home remains a haven of comfort and cleanliness. Remember, a well-kept RV toilet is a sign of a well-maintained RV in general, and the effort you put into this often-overlooked area will undoubtedly pay dividends in your traveling adventures.


Comments (0)
There are no comments for this article. Be the first one to leave a message!