The beauty of owning an RV is the fact that it combines the freedom of exploring the open road with the convenience of taking your home with you wherever you go. However, like any home or vehicle, your RV will occasionally need repairs. Fortunately, with the right RV parts, you’ll be able to fix many issues with minimal tools and expertise. By learning to handle these simple everyday RV repairs that anyone can do, you can save time and money while keeping your adventures on track.
Tightening a Leaky Faucet
A leaky faucet in your RV can be both annoying and wasteful. To fix it, start by turning off the water supply. Remove the faucet handle by unscrewing it, then check the cartridge, O-rings, or washers for wear and tear. Replace any damaged parts and reassemble the faucet. Turn the water back on to check if the leak is gone. To prevent future leaks, be sure not to overtighten the faucet and periodically check the O-rings and washers for wear.
Replacing a Broken Roof Vent
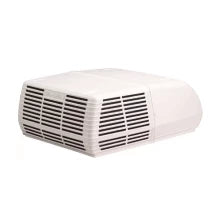
Roof vents help keep your RV well-ventilated but can sometimes break due to exposure to the elements. To repair a broken roof vent, start by removing the old vent cover. Unscrew the screws holding it in place and carefully lift it off. Clean the area around the vent opening, then place the new vent cover over it. Secure it with screws and apply a waterproof sealant around the edges to prevent leaks. Regularly inspect your roof vents for signs of wear and replace them as needed to keep your RV well-ventilated.
Resetting a Blown Fuse
If an electrical component in your RV stops working, a blown fuse might be the culprit. Locate your RV’s fuse box, which is usually found under the dashboard or in a cabinet. Identify the blown fuse by looking for a break in the metal wire inside. If possible, try resetting it. If that doesn’t work, you might need to replace it. Start by removing the blown fuse with a fuse puller or needle-nose pliers and then replace it with a new fuse of the same amperage. To prevent blown fuses, avoid overloading electrical circuits and regularly check the condition of your fuses.

Repairing a Faulty Toilet Seal
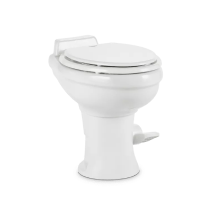
A faulty toilet seal in your RV can lead to unpleasant odors and leaks. To fix it, start by turning off the water supply to the toilet. Drain the toilet bowl and disconnect it from the water supply line. Next, unscrew the bolts at the base of the toilet and remove the bowl before inspecting the seal. The seal is usually a rubber gasket that you can easily replace if it’s damaged. Reinstall the toilet, reconnect the water supply line, and turn the water back on to check for leaks. Regularly inspect the toilet seal and replace it as needed to prevent troublesome leaks in the future.
Patching a Hole in the Exterior
While uncommon, small holes in your RV’s exterior can be patched to prevent water damage and maintain insulation. To remedy this issue, start by cleaning the area around the hole with soap and water. Dry it thoroughly, then sand it down to create a smooth surface. Apply a patching compound or fiberglass repair kit according to the manufacturer’s instructions. Once the patch is dry, sand it again to make it flush with the surrounding surface, then paint it to match the RV’s exterior. Regularly inspect your RV’s exterior for holes or damage and repair them promptly to prevent further issues like rust.
Restoring a Malfunctioning Water Pump
A malfunctioning water pump can disrupt your RV’s water supply. To fix it, check the pump’s power source first to ensure it’s properly connected. If the pump isn’t receiving power, check the fuse and replace it if necessary. If the pump is receiving power but still not working, inspect the pump’s diaphragm and seals for damage. Replace any damaged parts and reassemble the pump. Regularly maintain your water pump by cleaning its filter and checking for leaks to ensure it operates smoothly.
Silencing a Squeaky Door Hinge
Squeaky door hinges in your RV aren’t a major issue, but they can be annoying. Fortunately, they’re easy to fix. Start by identifying the squeaky hinge and applying a lubricant, such as WD-40 or silicone spray, to the hinge pin. Open and close the door several times to work the lubricant into the hinge. If the squeak persists, remove the hinge pin, clean it with a cloth, and apply more lubricant before reinserting it. To prevent squeaky hinges in the future, be sure to regularly lubricate them and keep them free of dirt and debris.
Switching Out a Damaged Window Screen
Damaged window screens can allow insects into your RV and mess up your ventilation. To replace a damaged screen, remove the screen frame from the window. Then, carefully take out the old screen material by prying out the spline, the rubber strip that holds the screen in place. Cut a new piece of screen material to fit the frame, then lay it over the frame and press the spline back into the groove to secure the screen. Trim any excess screen material and reinstall the frame in the window. Regularly inspect your window screens for damage and replace them as needed.

Reinforcing a Loose Cabinet Door
Loose cabinet doors in your RV can be a nuisance and lead to further damage if not addressed. To fix a loose cabinet door, start by tightening the screws on the hinges. If the screws are stripped or won’t hold, remove them and fill the screw holes with wood glue and wooden dowels. Allow the glue to dry, then reinsert the screws. If the cabinet door is still loose, consider replacing the hinges with new ones. Remain vigilant of the rigidity of your cabinet doors to ensure they don’t become this loose again.
Fixing a Cracked Skylight
The final everyday RV repair that just about anyone can do is replace a cracked skylight. This is important because leaving it untouched will lead to leaks and eventual water damage. To repair it, start by cleaning the area around the crack with soap and water. Dry it thoroughly, then apply a clear silicone sealant over the crack, smoothing it with a putty knife or your finger. Allow the sealant to dry completely before inspecting for any additional cracks or damage. If the crack is severe or the skylight continues to leak, consider replacing the entire skylight. Regularly inspect your skylight for cracks or damage and repair or replace it as needed to prevent the possibility of internal water damage.
Finally, keep in mind that this article is for informational purposes only and should not replace your owner’s manual or manufacturer instructions. Refer to these sources before attempting any repairs, including the ones in this blog.
Disclaimer: you should always refer to your owners manual first before attempting any repairs, this article is for informational purposes only, and should not replace the instructions from your owners manual or manufacturer instructions.


Comments (0)
There are no comments for this article. Be the first one to leave a message!